Bringing an electronic product from an idea to a real thing takes a clear plan. The path from a simple thought to a finished circuit board has many exact steps that must fit together. Understanding this process clarifies the construction of intricate devices.A smooth PCB manufacturing assembly process turns designs into physical boards with precision and care. This guide walks through the full process of making boards, from the first drawing to the final wrapped product. It covers the main steps where skilled teams turn designs into physical parts. The focus is on showing how each part links to the next to deliver reliable, high-quality results.
The Starting Point: From Idea to Drawing
Every board begins with a clear job and a list of needs that define its role. Engineers gather details about size, use, and working conditions before any design work begins. This planning phase sets the path for all steps that follow.
Skilled PCB assembly services turn these needs into detailed computer layouts. Designers place components carefully, considering both how the board works and how much space they require. Their work creates the map that guides the whole making process.
1. Drawing the Paths
Design software helps engineers map out every electrical route with exactness. Each line represents a critical link that must operate without fail. This digital map serves as the primary guide for construction.
2. Picking the Right Base
Different uses require different board materials, which affect how the board performs. Teams select bases that meet the electrical and thermal requirements of the design. The choice of material affects how long the board lasts and how signals move.
3. Making a Test Copy
Creating a small batch of boards helps verify that the design works before full production begins. This trial run shows any hidden issues that need fixing. Early testing saves significant time and reduces costs later on.
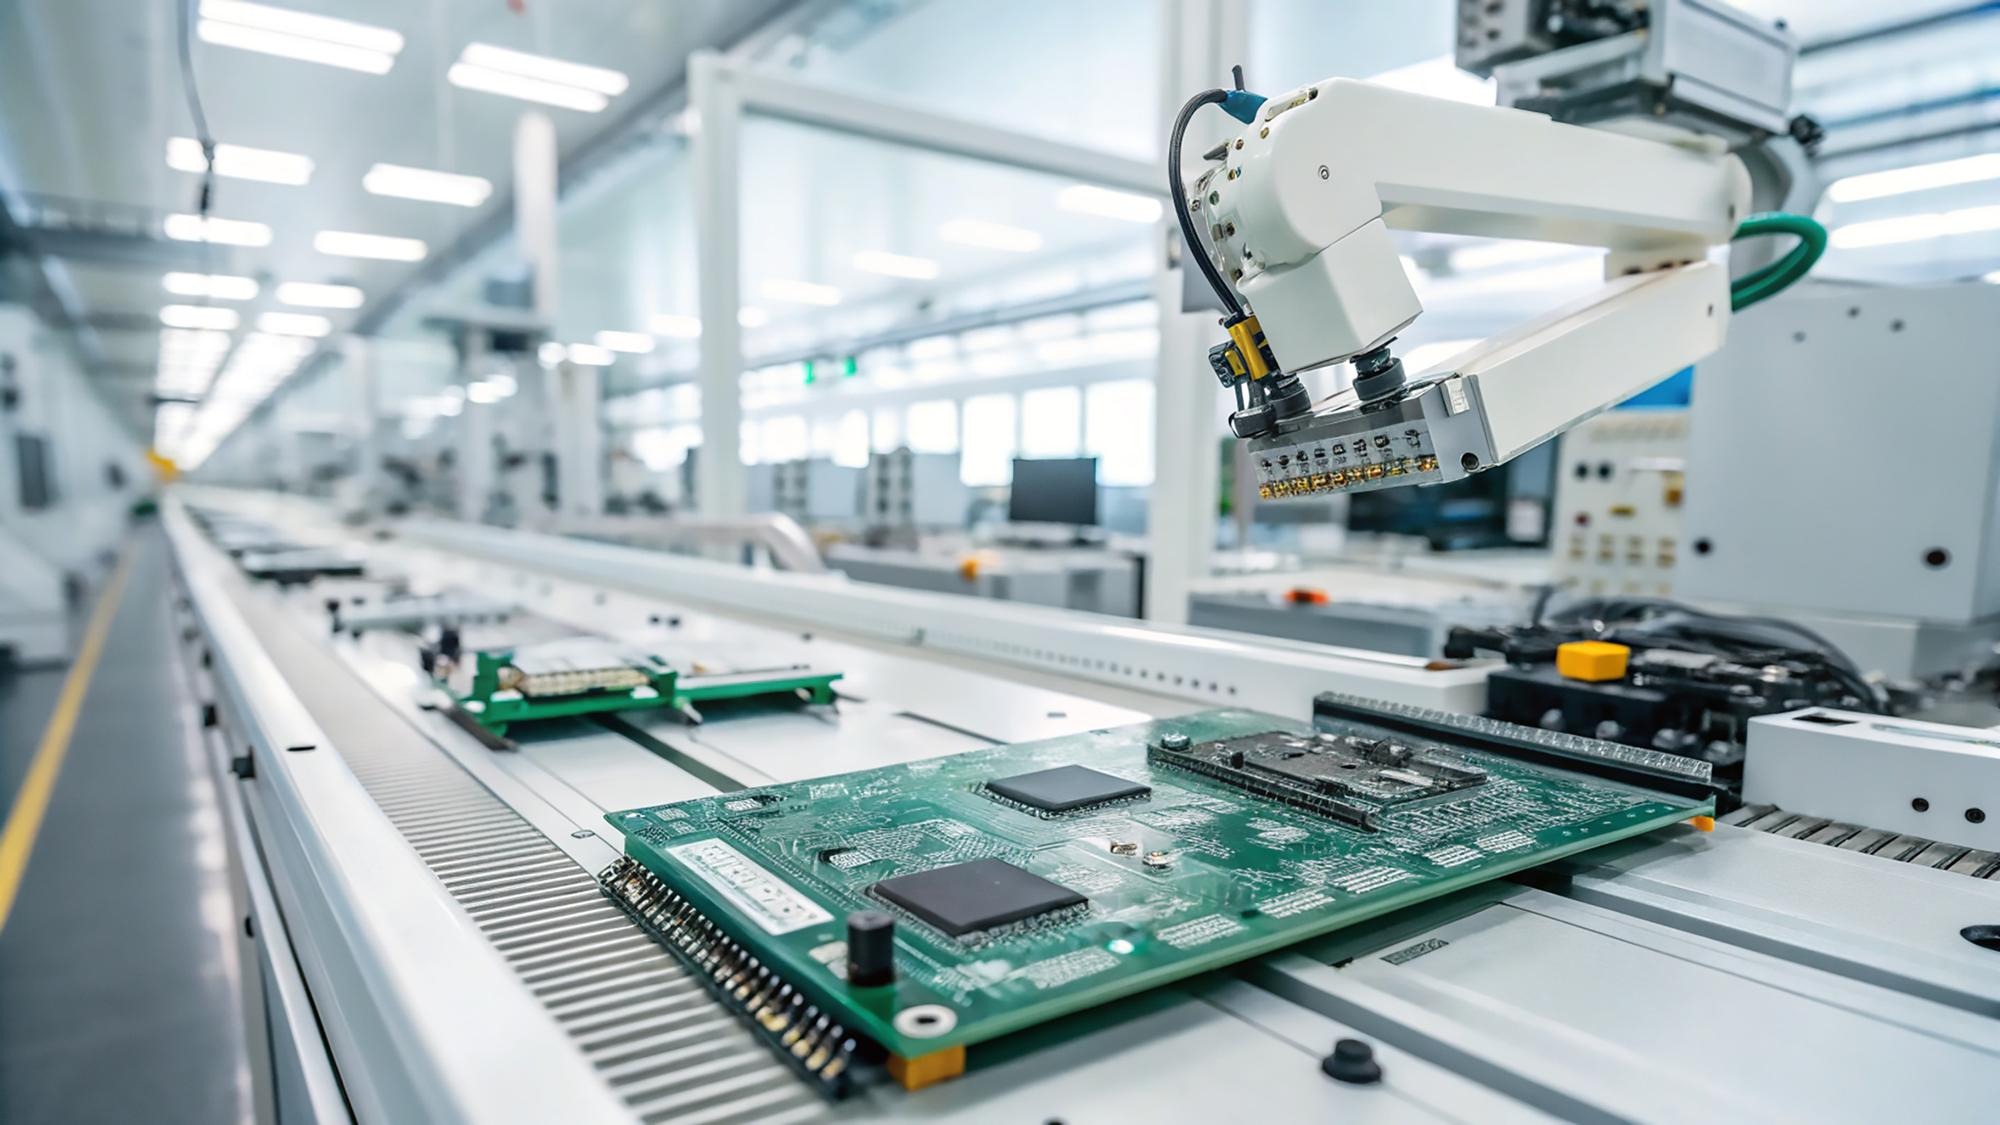
The Build Process
Once the design has been approved, the physical manufacturing process begins. The PCB manufacturing assembly stage transforms bare boards into fully functional electronic units, requiring precise machinery and skilled technicians to ensure accuracy throughout the process.
The process starts with preparing the bare boards for component placement. Solder paste is carefully applied to the exact locations where components will be mounted, creating the foundation for a reliable and accurate assembly.
| Step | What It Does |
| Solder Paste | Puts exact amounts of paste on connection spots |
| Part Placement | Sets each part where the design files show |
| Reflow Step | Melts the paste to make lasting electrical joints |
| Check | Looks at placement and joint quality |
After these steps, boards go through ovens that set the solder joints. Machines with cameras then scan for any parts placed incorrectly. This layered way ensures steady quality across every board.
Getting Parts and Managing Stock
Finding the right parts is a key part of successful board building. Teams work with trusted suppliers to obtain genuine components that meet the design needs. This network of sources keeps production running continuously.
Managing the supply chain requires oversight across several key areas. Teams must balance what is available, what is genuine, and timing to keep projects moving forward. Each choice in this phase shapes the overall production schedule.
- Checking that parts are genuine starts with buying from trusted sellers. Teams review each part’s source to prevent counterfeit parts from entering the process. This care protects the quality of every finished board.
- Planning for what is available means forecasting needs well ahead. Some parts take longer to get, so they need smart ordering plans. This forward-thinking prevents gaps that could slow production.
- Keeping stock levels right balances amounts against storage space. Teams track inventory numbers carefully to maintain adequate stock without waste. Smart stock habits support smooth, non-stop production runs.
Ways to Put Parts Together
Different types of parts require different placement methods during assembly. Teams pick methods based on part size, how they connect, and how complex the design is. The right method ensures strong electrical joints.
Surface Mount Method
This modern method places components directly on the board. Machines place even very small parts with great accuracy. Surface-mount technology enables compact, high-density designs.
Through-Hole Method
Bigger parts that need stronger physical joints use through-hole methods. Wires go through the board and get soldered on the other side. This way gives extra strength for plugs and connectors.
Mixed Method Boards
Many designs use both surface-mount and through-hole parts. Teams handle these mixed boards with care to ensure all parts join well. Mixed methods provide room to work for complex needs.
Testing and Quality Checks
Before boards leave the shop, they go through full performance tests. Testing ensures every link works and each part does its job. This verification builds trust in the final product.
The testing phase uses multiple testing methods to identify various types of issues. Each approach looks for specific flaws that could impair how the board operates. Putting these ways together gives full quality coverage.
- Machine vision checks use cameras to scan each board. This system assesses part placement and solder quality with consistent results. It finds alignment issues that human eyes might miss.
- Circuit tests verify electrical connections and component values across the board. Special tools confirm that every electrical path works as designed. This testing finds hidden faults before they cause problems.
- Working tests power up boards under simulated real-world conditions. This final inspection ensures the entire unit performs as intended. It provides final proof that the build succeeded.
Making Different Amounts of Boards
Projects vary widely in how many boards they require at any given time. Teams change their process to fit everything from small test runs to large production batches. This flexibility supports many kinds of needs.
1. Test Batches
Small runs let designers test new ideas before producing larger quantities. These limited builds validate the design and identify any necessary changes. They provide useful learning with minimal risk.
2. Mid-Size Production
Many projects fall into a middle range where efficiency matters a lot. Teams set up smooth steps that balance speed with careful watching. This approach supports a wide range of use cases.
3. Growing for Demand
When products take off, production needs can grow fast. Teams can increase output without sacrificing quality. This ability to grow supports long-term product success.
Handling Hard Assembly Needs
Some components require extra care during placement due to their size or design. Advanced ways help teams handle these tricky parts with success. Special tools make sure even challenging parts join well.
1. Small-Spaced Parts
Parts with tight spacing between links require precise placement. Teams use high-magnification tools to check alignment before soldering. This care supports modern, high-density circuit designs.
2. Ball Grid Arrays
These parts have links underneath instead of around the edges. Special tools handle the placement and inspection of these parts. Advanced rework methods allow repairs when needed.
3. Bendable Circuits
Some applications require boards that bend or fit into tight spaces. Bendable materials let circuits take on unique product shapes. This skill opens new ways for product design.
Records and Tracking
Keeping full records throughout production serves several key purposes. Clear records help teams follow each board’s path from start to end. This tracking supports quality control and future use.
1. Writing Key Data
Teams log important details about materials, settings, and test results. These records give a clear view of every production step. They help identify patterns and ways to improve.
2. Keeping Rule Records
Some fields need proof that boards meet certain standards. Adequate records indicate that the buildings comply with the required rules. This documentation supports regulatory requirements when requested.
3. Helping Future Runs
When repeat orders come in, records guide consistent production. Teams look back at old settings to maintain the same quality. This consistency ensures that products remain consistent over time.
Wrapping and Final Shipment
The last step prepares the boards for their trip to the next location. Careful packaging keeps sensitive components safe during transit. This final move ends the full production cycle.
1. Safe Packing
Boards get packing that shields them from static and bumps. Teams select materials that address each board’s specific weaknesses. Good packing makes sure products arrive in perfect shape.
2. Clear Labels
Each shipment has labels that link back to production records. Labels help recipients verify they received the correct items. This organisation supports smooth integration into final products.
3. Ready to Use
You can directly integrate boards into larger systems. No extra steps or preparation are required. This ready state accelerates final product assembly.
